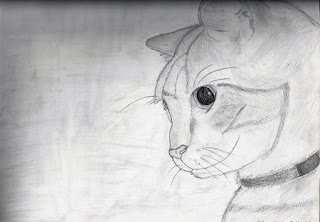
Tuesday, September 7, 2010

Everything You Wanted to Know About the Pencil

Did you know that what people call the pencil “lead”, is really graphite? This incorrect name originated back in the mid-16th century. A big storm knocked over trees in Borrowdale, England, revealing a large deposit of a black substance that people believed to be lead. The locals found the substance very useful for marking their sheep.


It was over 200 years later that an English scientist found out that the substance was not lead, but a type of carbon. Today, many people still use the misleading term. Probably if it was lead, no one would be using pencils for fear of poisoning.

This new substance was named graphite, after the Greek word grapho - γράφω, which means “to write”. Because the graphite was so useful for marking things, people began using the graphite in art and writing. They found that since the graphite would mark their hands, people started to wrap the graphite in string or sheepskin. These tools were called pencils, which comes from the Latin word “pencillus”, meaning “little tail.”

As with charcoal pencils, there are different types and styles, but they have a wider range. The grades are 9B, 8B, 7B, 6B, 5B, 4B, 3B, 2B, B, HB, F, H, 2H, 3H, 4H, 5H, 6H, 7H, 8H, and 9H. Pencils made with more clay produce a harder pencil, while less clay produces a softer one. The harder the pencil is, the lighter, the softer, the darker. B means soft, and H means hard.
Have you ever wondered about the history of the pencil as we know it as you are sketching? The first pencils came into use in 1560. These pencils were low grade, and fell apart easily. People used to hollow out the casing that they wanted to put the core into, and then slipped in a thin core. This method had to be improved, as it was a slow and inefficient process.
One of the failed attempts at making a good pencil was done by the Faber‘s. The German family used powdered graphite to make a substandard crude pencil.

It was not until 1795 that Nicholas Jacques Conte (N.J. Conte), a French army officer, made the first truly successful pencil. It is very similar to the way pencils are made today. The core was made of powdered graphite, mixed with clay, after which it was molded into a thin stick. The last step of making the core is to bake the “dough” in a kiln.
Now that it was improved, the casing had two parts, making it easy to glue together after you inserted the core. All pencil manufacturers now use his recipe today.
After the working pencil was made, the Faber family copied N.J. Conte’s method and became successful themselves.

In the modern day, most of us use pencils in our art. We may be sketching out an outline for a painting, or doing a pencil drawing. Next time you hold a pencil, just think about how they were made, and have fun!

Monday, July 19, 2010

All About Charcoal Pencils

Have you ever wondered what a charcoal pencil really is? What types are there? To get all of these questions answered, we should start at the beginning.

How was the charcoal made? Wood is slowly heated in the absence of oxygen, which leaves you with a black substance that resembles coal. This substance is 50-95% carbon, while the remaining percent is volatile chemicals and ash. If you've ever sat around a campfire and watched the wood burn, you will know that it becomes black, and can crumble in your fingers.

Now we know how the charcoal is made, but how is it used it art? There are a few different types of artist's charcoal. these are vine charcoal, compressed charcoal, and powdered charcoal. Vine charcoal is made by burning sticks of willow or linden/Tilia trees. Compressed charcoal is produced by mixing charcoal powder and gum binder. The charcoal is then compressed into round or square sticks. This is what is used in charcoal pencils, which usually have a smooth cedar cover. Last but not least, there is powdered charcoal. This is used for shading large areas.

I tend to use my charcoal pencils when doing shading and very dark areas. My main drawing is usually done in graphite, which is lighter and more reflective than charcoal. The reason charcoals are more likely to be used for shadows is because they don't reflect very much light. Who would want a shadow that was brighter than the object itself?

Charcoal pencils range in color from gray to dark black. The grades are: H, HB, B, 2B, 3B, 4B, 5B, and 6B. They are very versatile and can be used in a complete grayscale sketch.
Now that you know a little bit more about your charcoal pencils, go out there and start sketching!


I'm going to leave you with my negative drawing of an old pair of shoes.


Thursday, June 3, 2010

Sketch a Painting

Have you ever tried using watercolor pencils? If you are a pencil artist like me who likes to sketch, then this is the painting method for you. The watercolor pencil is actually just a water soluble colored pencil. This means that you can draw fine details and blend them with water.

The watercolor pencils that I use come from Faber Castell, and they come in many different shades. There are many different watercolor pencil techniques, but my favorite method is sketching out my painting with a regular pencil, coloring it in with the different colored watercolor pencils, and then applying water with a brush. You can also dip the tip of your pencil in water, and then draw onto dry paper, but this method uses up the pencil lead very easily. Another way to use your watercolor pencils is to slightly wet your paper and draw with a dry pencil. This creates unique bleeding effect.

What I love about using these versatile pencils is that you will have the watercolor paint look, but all you really did was draw. The reason I usually sketch is because painting can be difficult, as you have to have a bunch of different colors to get the right values. When the paint dries you can't blend the colors, but when it's wet you can't add more paint. Watercolor pencils are similar to this. It is easier to do all of your shading if you add all of the color before applying a little water. From my experience you can't really put new layers with watercolor pencil, as the color is thin and will be a little see through.

Try using different mediums in addition to your watercolor paint, such as pens or a different type of paint such as acrylic, which is my other main painting medium. Just have fun using your watercolor pencils, and make your own masterpiece!


This is watercolor pencil painting of a rosebud.

Wednesday, June 2, 2010

SketchPad has a new look!

Did you notice the new look? All of the entries are still here, even if the blog does look a little different. Please comment and tell if you like it!

Tuesday, May 18, 2010

Submit Your Sketch!

Have you ever submitted your art into a contest?  I've been doing it since I was four years old. There are many  contests out there, and you should always try entering one if you like art.
There is one thing that you should know before submitting your art.  Sometimes you win, and sometimes you don't.  Learning this rule may be painful, but don't feel bad and give up drawing just because you have felt the sting of failure.
If you keep trying you will win something! Never giving up hope is another important thing.  Once I submitted a painting into a magazine, and 3 years later it was published.  The whole time I had been hoping and checking the magazine for my painting. Sure enough, my art was finally published!  I have won many art contests, and I have lost many as well.  What I'm saying is feel free to submit your art into contests and keep trying if you lose.  Reach for the stars!
I'm going to leave you with one of my drawings, which was published due to trying.

Monday, April 5, 2010

Time Lapse Sketching

I was inspired to make a time lapse video of me drawing.  After setting up my camera on a mini tripod and framing the shot, I wondered what to sketch. Looking around, I spotted a photograph of a friend.  Using the drawing from photographs technique, I began to draw.  My camera stopped recording after 30 minutes or so, so I tried not to move and restarted it.  It was my first time making a time lapse video, and I used the web to figure out how to make one.

Here are some tips on how to make a time lapse video yourself:

  • Don't rush, as you will be speeding up the video afterwards.
  • Download your video to the computer.
  • Make sure that your video editing software lets you speed up video.
  • Find out if your video format is compatible with the effect.  Mine wasn't, so I had to change it.
  • Speed up your video.  I sped mine up 15x.
  • Overall, have fun!

Here's the video!

Thursday, March 11, 2010

Simulating Snapshots

The day after my birthday I went to watch some skijoring. Skijoring is where a person on horseback pulls a skier on a course.  The skier is pulled over jumps made of snow. I used my brand new camera to take a whole bunch of pictures. Taking pictures is my other hobby.  Check out my photography site at http://ezshots.webs.com/.   A month later as I looked over my pictures, one inspired me to sketch it.  It took me an evening to draw this one, as I developed the drawing and gave it life.  I used my charcoal pencils to enhance the dark areas, such as the eye and nose. Horse eyes, in my opinon, are some of the hardest things to draw, as they are so glossy. 
You don't have to completely copy the photo that you are reproducing. It's not rocket science to make a few changes with your own imagination.  I put in a simpler backround, and just left the rope halter, instead of having the whole bridle.
Below you can compare my sketch and the actual photograph.  Happy drawing!   

Thursday, February 25, 2010

Still Life

Still life is one of the easiest things to draw or paint.  What is still life?  It is a picture consisting of inatimate objects, such as flowers or fruit. All you have to do is draw a bouquet of flowers or a bowl of strawberries that are sitting on your table. Use your own imagination as well! Just remember, if you are going to paint, make sure that you sketch out your drawing first. I decided to display my painting of an eggplant, bell pepper, and tomatos.

Tuesday, February 9, 2010

Artsy Animals

For todays post, I'll talk about drawing animals. Our four legged friends seem to be a fairly popular thing to draw. There are various how to books on drawing horses, dogs, cats, and even sea animals! 
I like to use pets as models, as well as pictures on the internet, books, and my own ideas.  I'll give you a couple samples of my animal art.  Directly below is a drawing of a pug and chihuahua.


Below is my drawing of a horse.

Wednesday, January 13, 2010

Drawing What you See

Today let's talk about drawing what you see.  When you don't have an idea, just look around and draw what is in the room.  Drawing everday items, like a...shoe, is not only fun, but easy, too. Start by drawing just the shapes and forms.  Next add in the details.  Last, but not least, shade your drawing.  Sometimes I really can't capture what I am trying to draw, but at least I try.  Trying is an important tool in art. Remember, "practice makes perfect!"

Below are my attempts to draw a shoe, blow dryer, cold sore medication, and a hole puncher.

Sunday, January 10, 2010

Autumn Barn

Even though my main medium is pencil, sometimes I enjoy painting.  I find that books on painting are helpful when you don't know where to start.  That kind of book usually gives step by step instructions on how to draw or paint a certain scene, from still life to landscapes.  The type of paint you use is another thing to think about.  I use mostly acrylic, because it is fast drying, but I am considering trying watercolors. The following barn was painted with acrylic paint.


Thursday, January 7, 2010

Pencil Portrait

One of my favorite things to draw are portraits of people.   Usually the best way to capture a person's appearence is to work in certain sections of the face, and draw the shapes that you see.  Then put in shading, which gives a nice look.  I got a friend to sit still while I drew the following picture: